


My zine, my two cities, shows side by side photos from my time in NYC and my current city, Lisbon. It’s a love letter to both cities, the person I was in New York, and the person I’m becoming in Lisbon. I’ve loved sharing this zine with everyone here on Substack, and I’ve been really touched by the kind words from so many of you. If you haven’t already read my original post about this zine and my struggle with a fear of failing, you can check that out here. What follows below is my attempt at a tutorial for this zine. Please keep in mind I’m new to zine creation and I tend to “wing it” when it comes to measuring things.
Create your zine using this Canva template*.
You’ll need 16 images, one for each page. I’ve added page numbers for reference; please be sure to delete them before printing. A note about printing: The template is in A4 format, but it can easily be printed on standard 8.5” x 11” paper by using your printer's size-to-fit option.Trim the excess white space on the four sides of your printout.
Despite numerous attempts, my printer will not print to the edge so there’s always a small amount of white space to trim. I cut right up to the edge of the image. You’ll likely have a little bit more to trim off if you’re using 8.5” by 11” paper.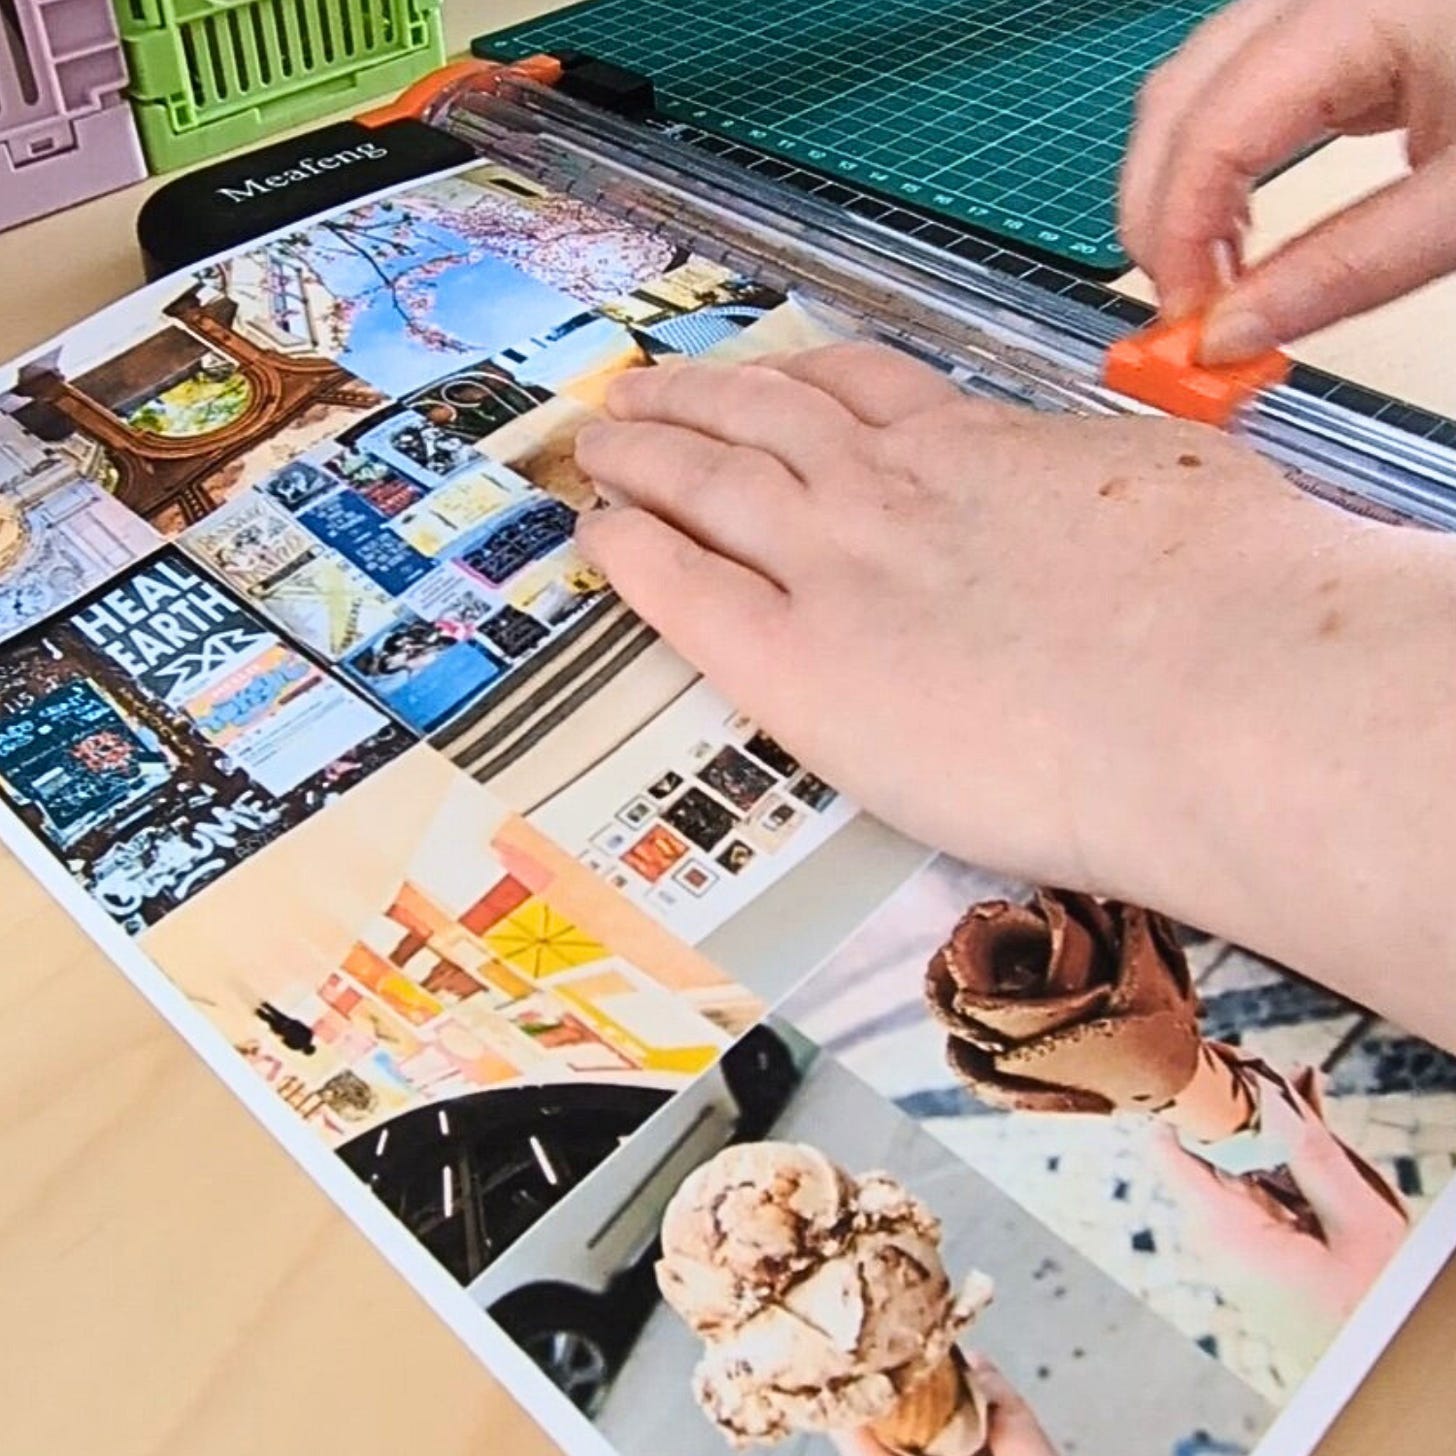
Fold along the edge of each image/page.
All three horizontal folds and the center vertical should be made with the images on the outside, as this is the way the pages will fold when assembling the zine. The two outer vertical folds should be made with the images on the inside; these folds will be the center creases of each two-page spread.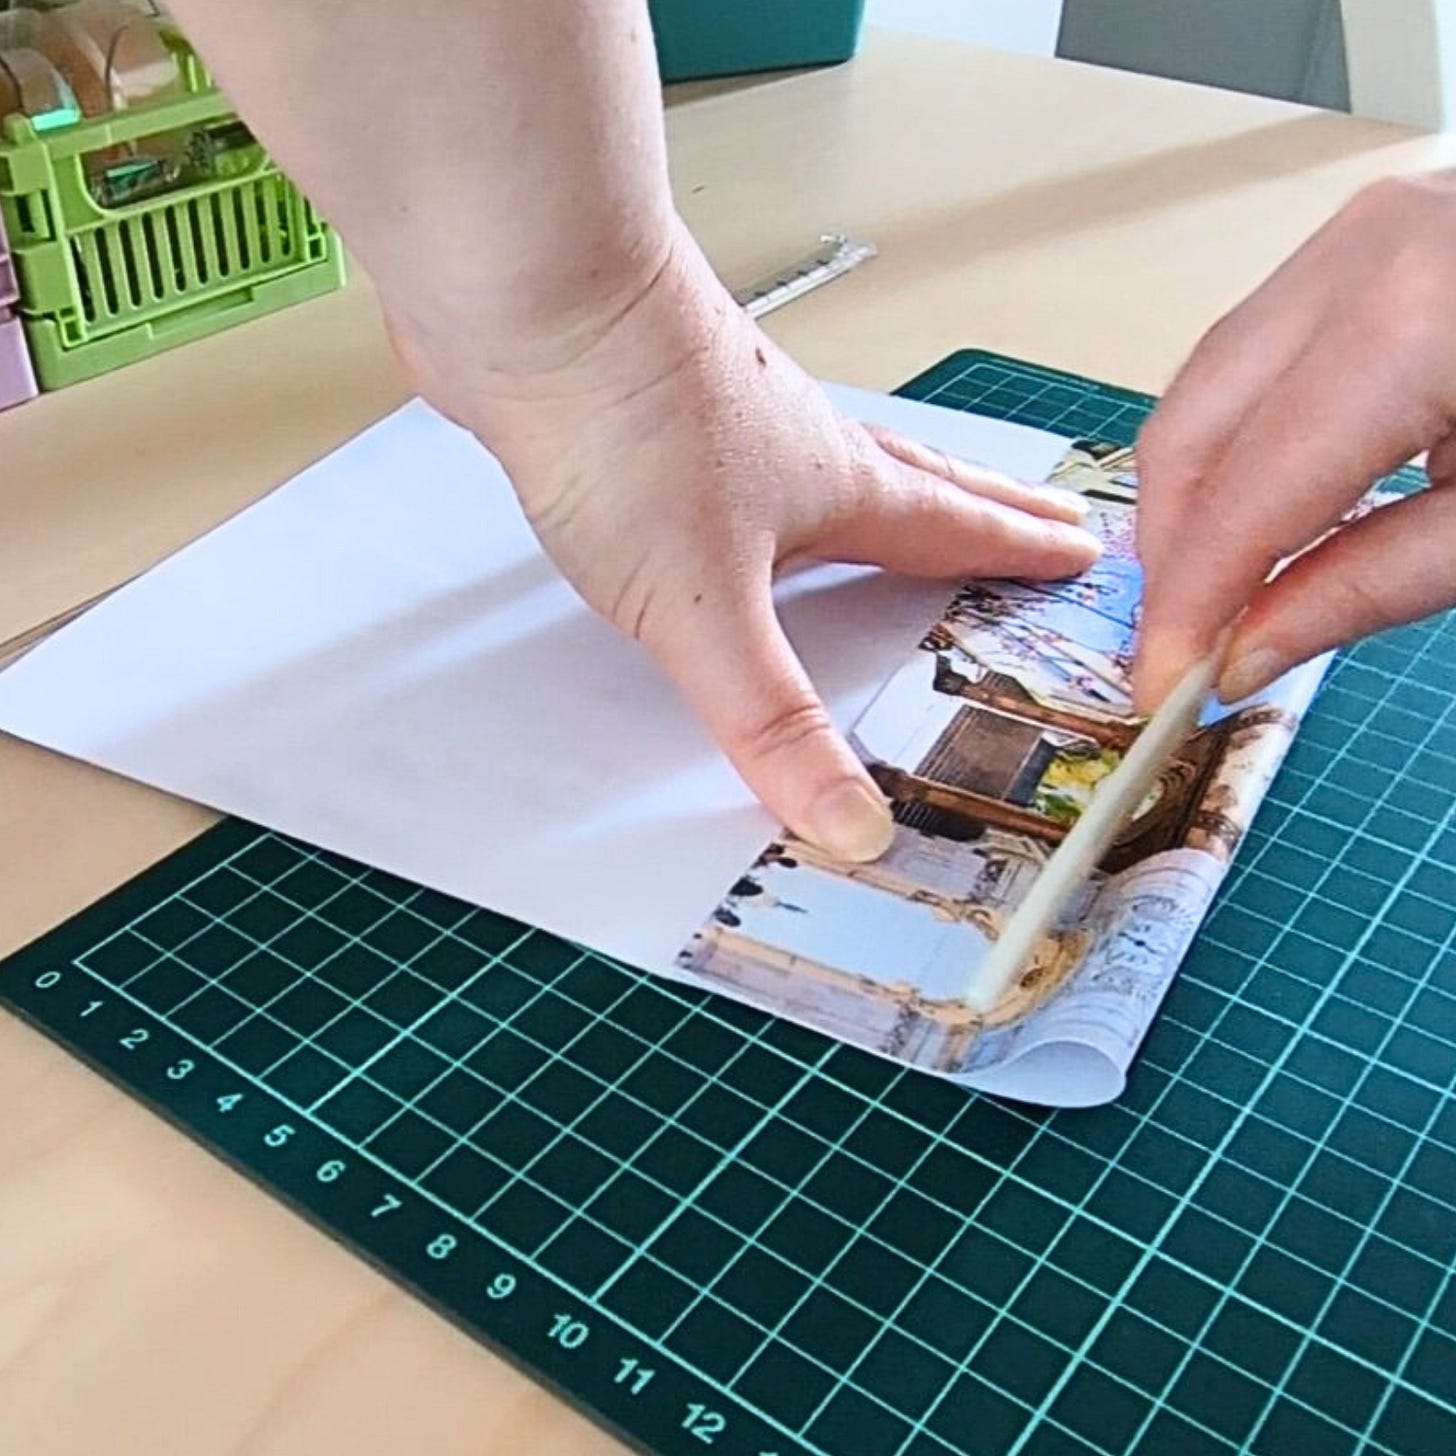
Cut along the horizontal folds using the guide below.
Be sure to stop cutting where the guidelines stop so that the page stays intact for folding.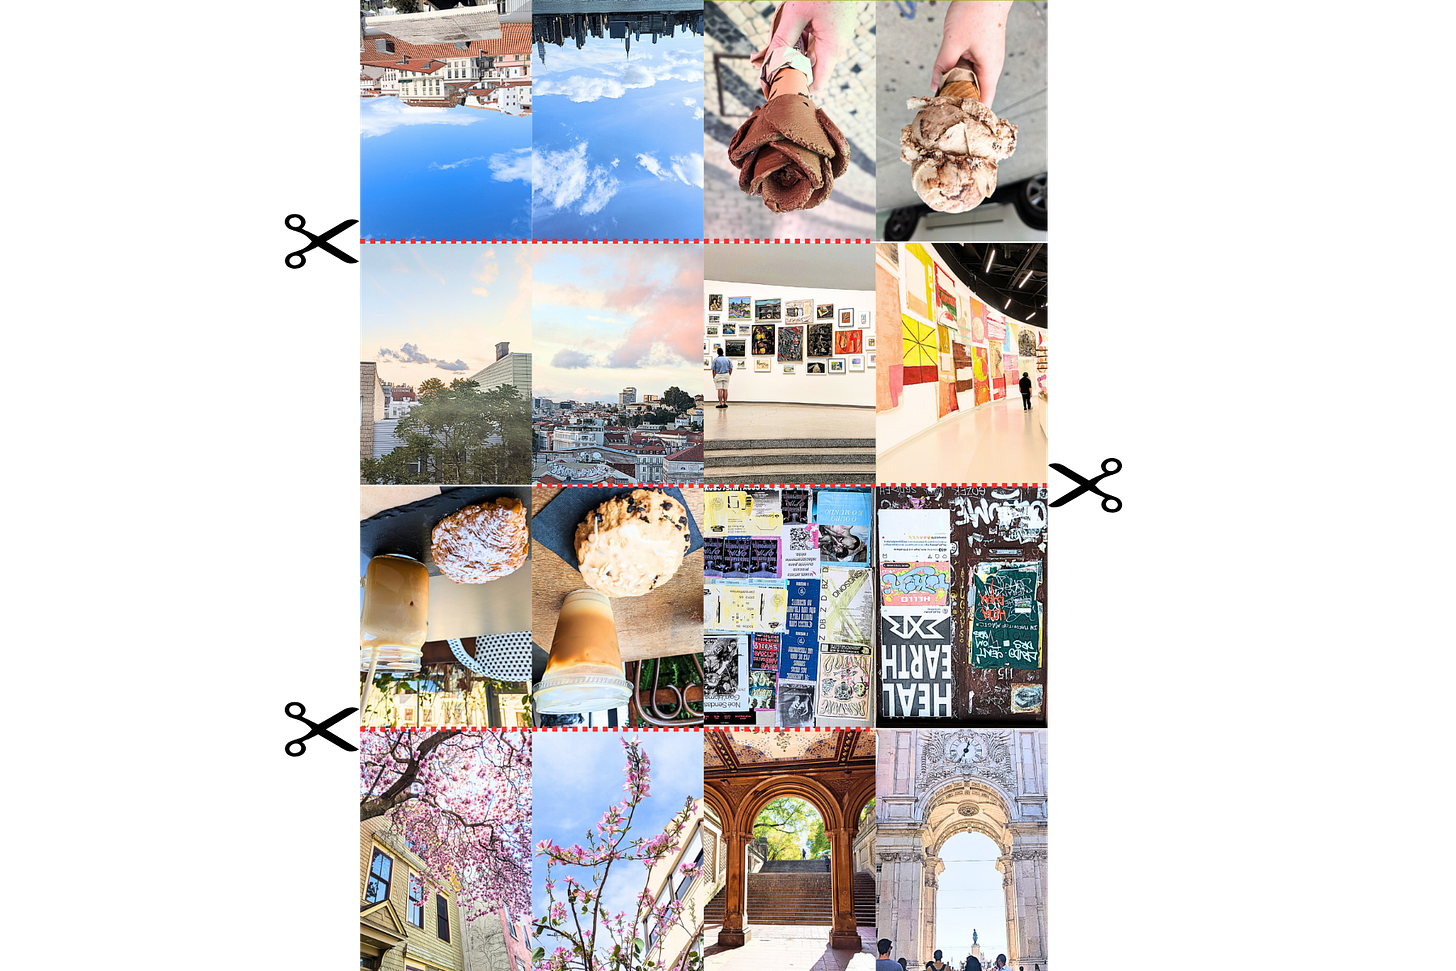
Fold your printout into a booklet.
If you followed the folding instructions above, the pages should now fold correctly, with each page right side up. This part is optional, but I like to glue the backs of the following pages together: pages 4 and 5, pages 8 and 9, and pages 12 and 13. These are the pages that fold at the top or bottom, and gluing them together stops those flaps from being visible.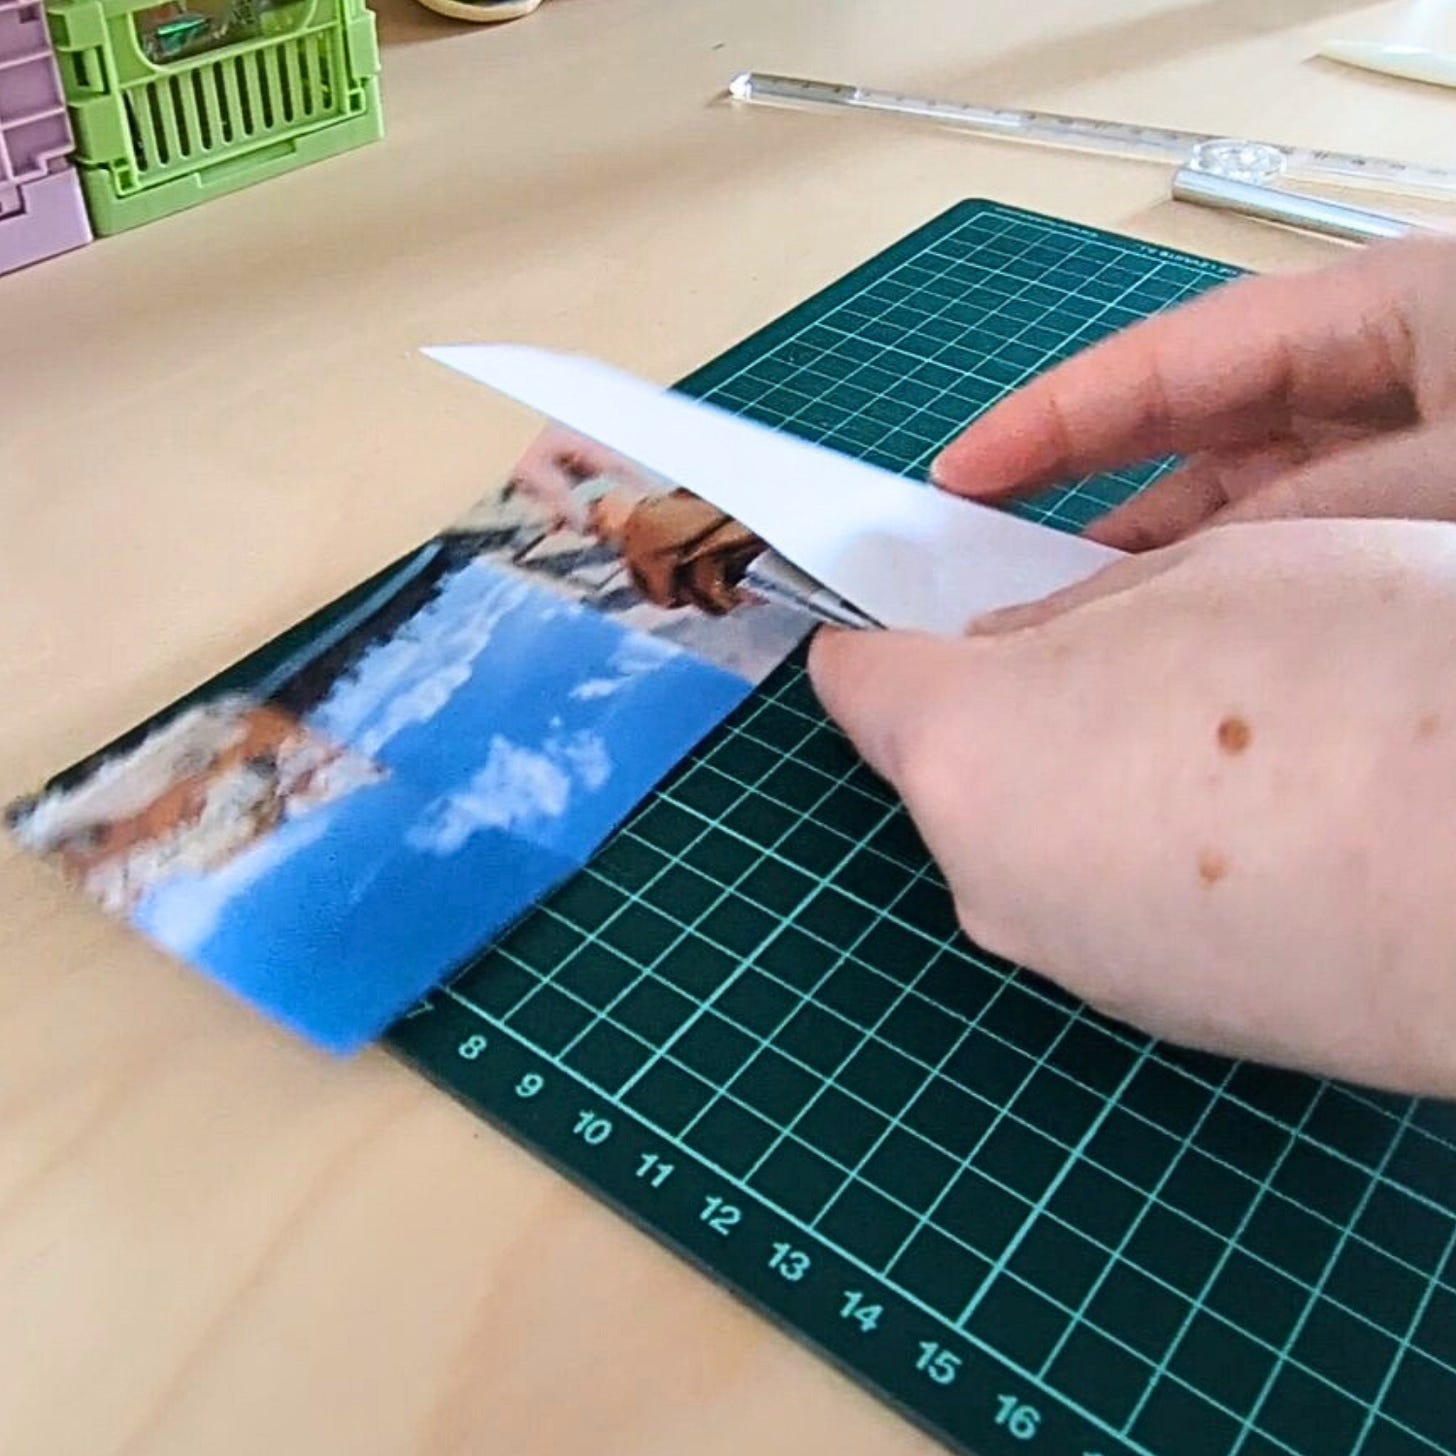
Create the front and back covers.
I up-cycled a flat mailer for the covers, but you could use a cardboard carton or heavy cardstock. Place the folded zine on the cardboard and trace around the edges. Do this twice, so you have a front and back cover. If you want your cover to be a bit larger than the pages, you could measure out an allowance around your tracing, but I’m all for not measuring stuff, so I kept them the same size. Once you’re happy with the size, cut out the covers.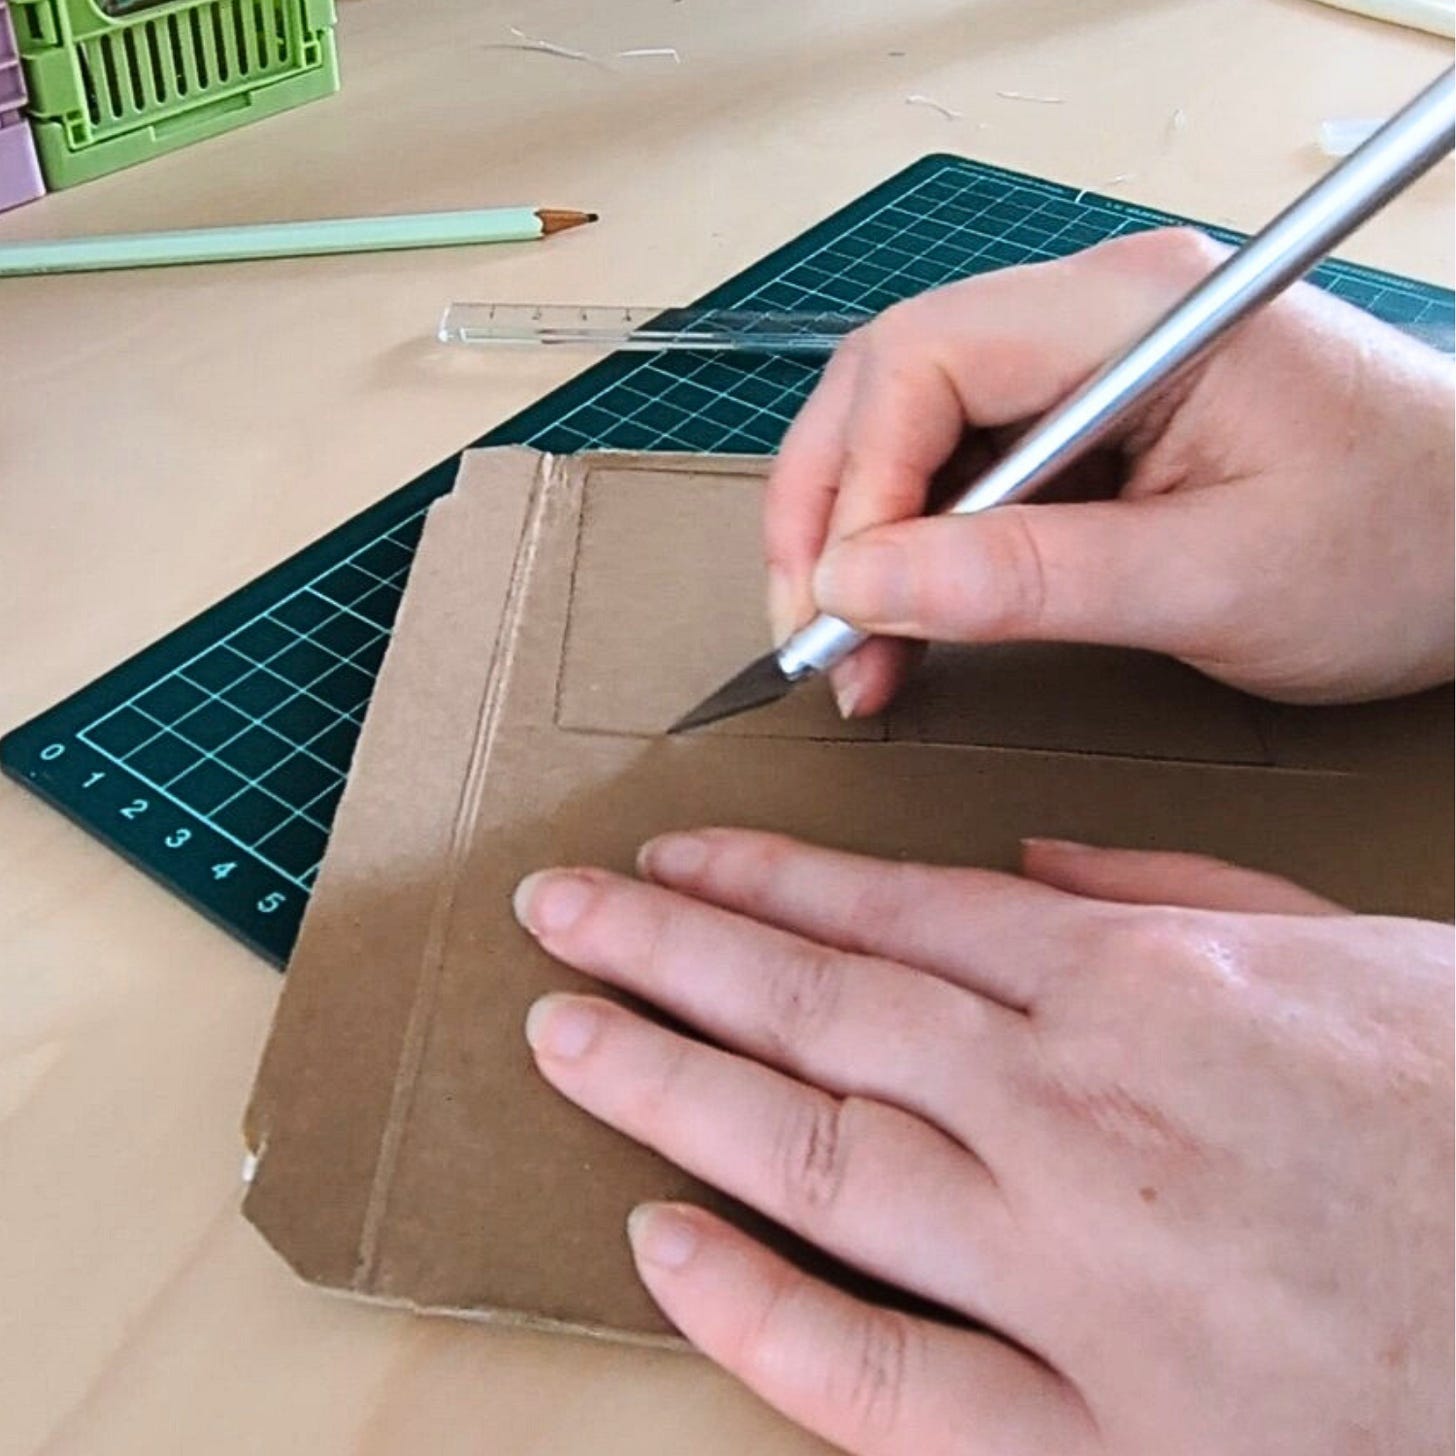
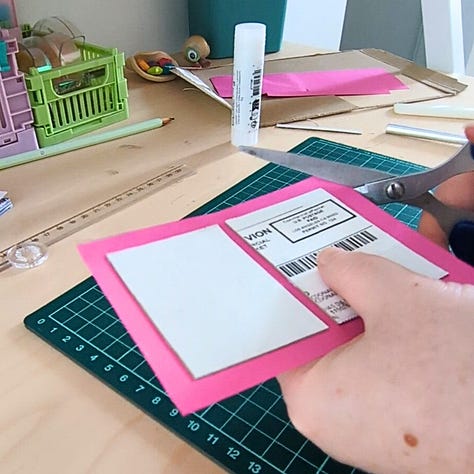
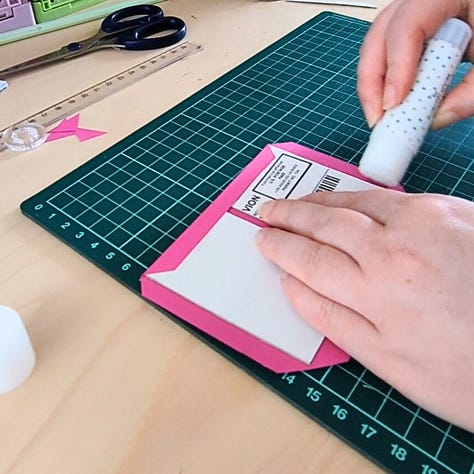
Connect the two covers.
I’m using a piece of origami paper for this, but any lightweight paper would work. Thoroughly cover one side of each cover with glue and press firmly onto the inside of the cover paper. I eyeballed the placement, but I recommend leaving at least a half-inch allowance around the edges of the covers and about a half-centimeter in between the two covers for the spine. Trim off the excess paper (keeping the half inch allowance) and the corners of the edges, leaving just a tiny bit to ensure the paper covers the corners when it’s glued down. Now fold each side of the origami paper around the edges of the covers to create a nice crease. Cover the flaps with glue and fold them securely around the covers.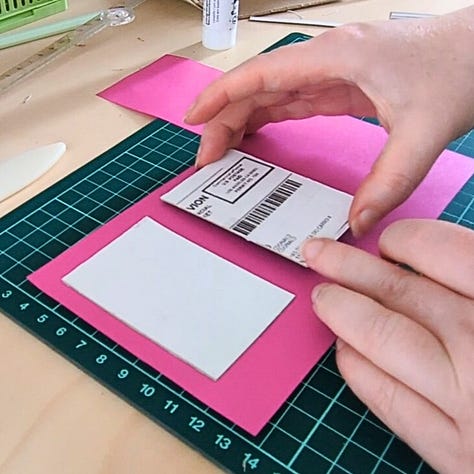
Insert the booklet into the cover.
Cover the back of the front page with glue and press it firmly into the inside of the front cover. Make sure to align the center crease of the first page spread with the inner edge of the front cover. Repeat this step for the last page, ensuring that the center crease is aligned with the inner edge of the back cover. Close the covers and let the zine dry under a heavy book.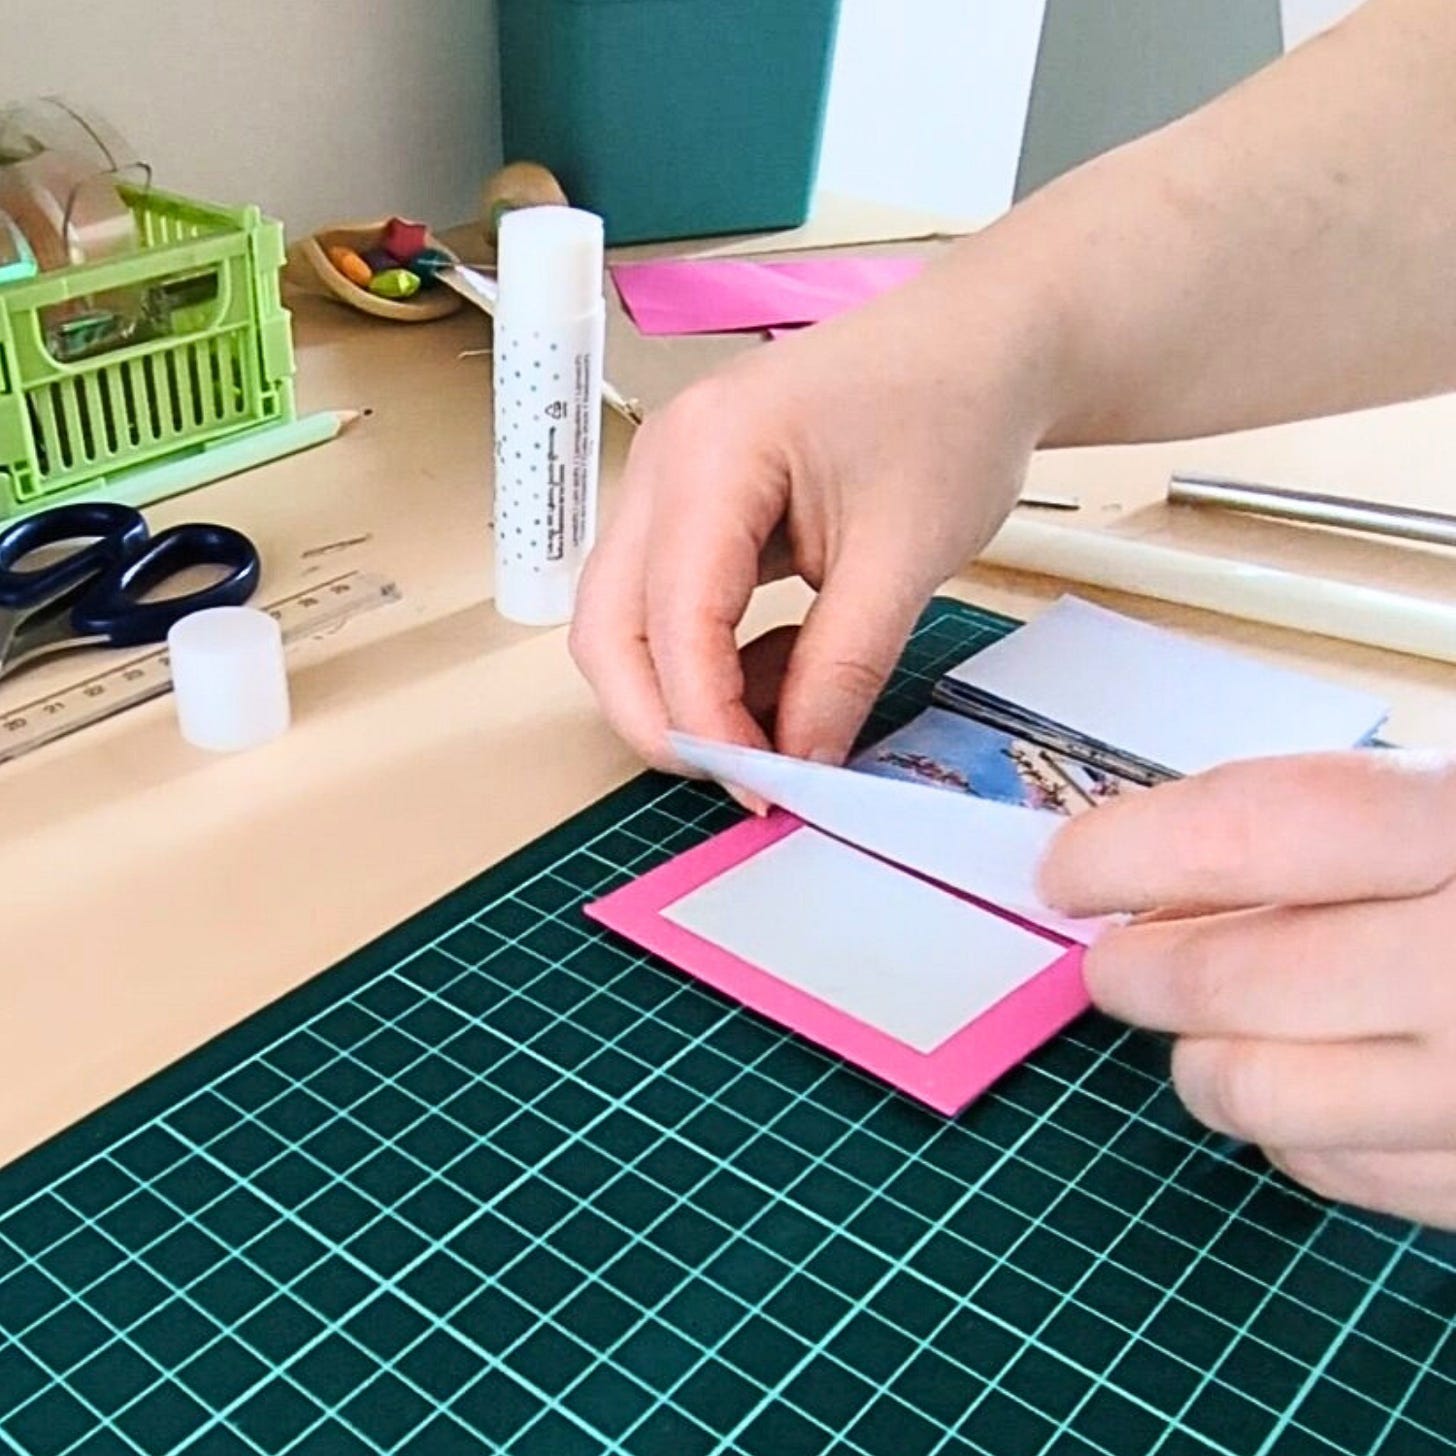


I hope you enjoyed this tutorial for a 16-page zine. Nothing happens in a vacuum so I will always do my best to site my sources of inspiration. Inspiration for this zine format came from yousyomitai on instagram and
’s What does a seed look like?That said, if you’d like to support my art and writing, you can do so via my Ko-fi account. Thank you for being here and please consider tagging me in any zine creations this inspired. I’d love to see what you make!

this is so cool - thank you for sharing <3
I love this - thank you for sharing. I've recommended Re-assembled on my substack x